由于结构是标准化的,项目变得更加统一,这使得团队新成员的入职更加容易。 * **面对变化和重构的稳定性**
一个 layer 上的模块不能使用同一 layer 上的其他模块,或者上层的 layers。
这允许您进行独立的修改,而不会对应用程序的其余部分产生不可预见的后果。 * **可控的逻辑重用**
根据 layer,您可以使代码非常可重用或非常本地化。
这在遵循 **DRY** 原则和实用性之间保持平衡。 * **面向业务和用户需求**
应用程序被分割为业务领域,并鼓励在命名中使用业务语言,这样您可以在不完全理解项目的所有其他不相关部分的情况下做有用的产品工作。 ## 渐进式采用[](#incremental-adoption "标题的直接链接") 如果您有一个现有的代码库想要迁移到 FSD,我们建议以下策略。我们在自己的迁移经验中发现它很有用。 1. 首先逐模块地慢慢塑造 App 和 Shared layers 以创建基础。 2. 使用粗略的笔触将所有现有 UI 分布在 Widgets 和 Pages 中,即使它们有违反 FSD 规则的依赖。 3. 开始逐渐解决导入违规,并提取 Entities,甚至可能提取 Features。 建议在重构时避免添加大型新实体,或者只重构项目的某些部分。 ## 下一步[](#next-steps "标题的直接链接") * \*\*想要好好掌握如何用 FSD 思维?\*\*查看[Tutorial](/documentation/zh/docs/get-started/tutorial.md)。 * \*\*喜欢从示例中学习?\*\*我们在 [Examples](/documentation/zh/examples.md) 部分有很多内容。 * \*\*有问题?\*\*访问我们的 [Telegram 聊天](https://t.me/feature_sliced) 并从社区获得帮助。 --- # 教程 ## 第一部分。理论上[](#第一部分理论上 "标题的直接链接") 本教程将检查 Real World App,也称为 Conduit。Conduit 是一个基本的 [Medium](https://medium.com/) 克隆 — 它让您阅读和编写文章,以及对他人的文章进行评论。 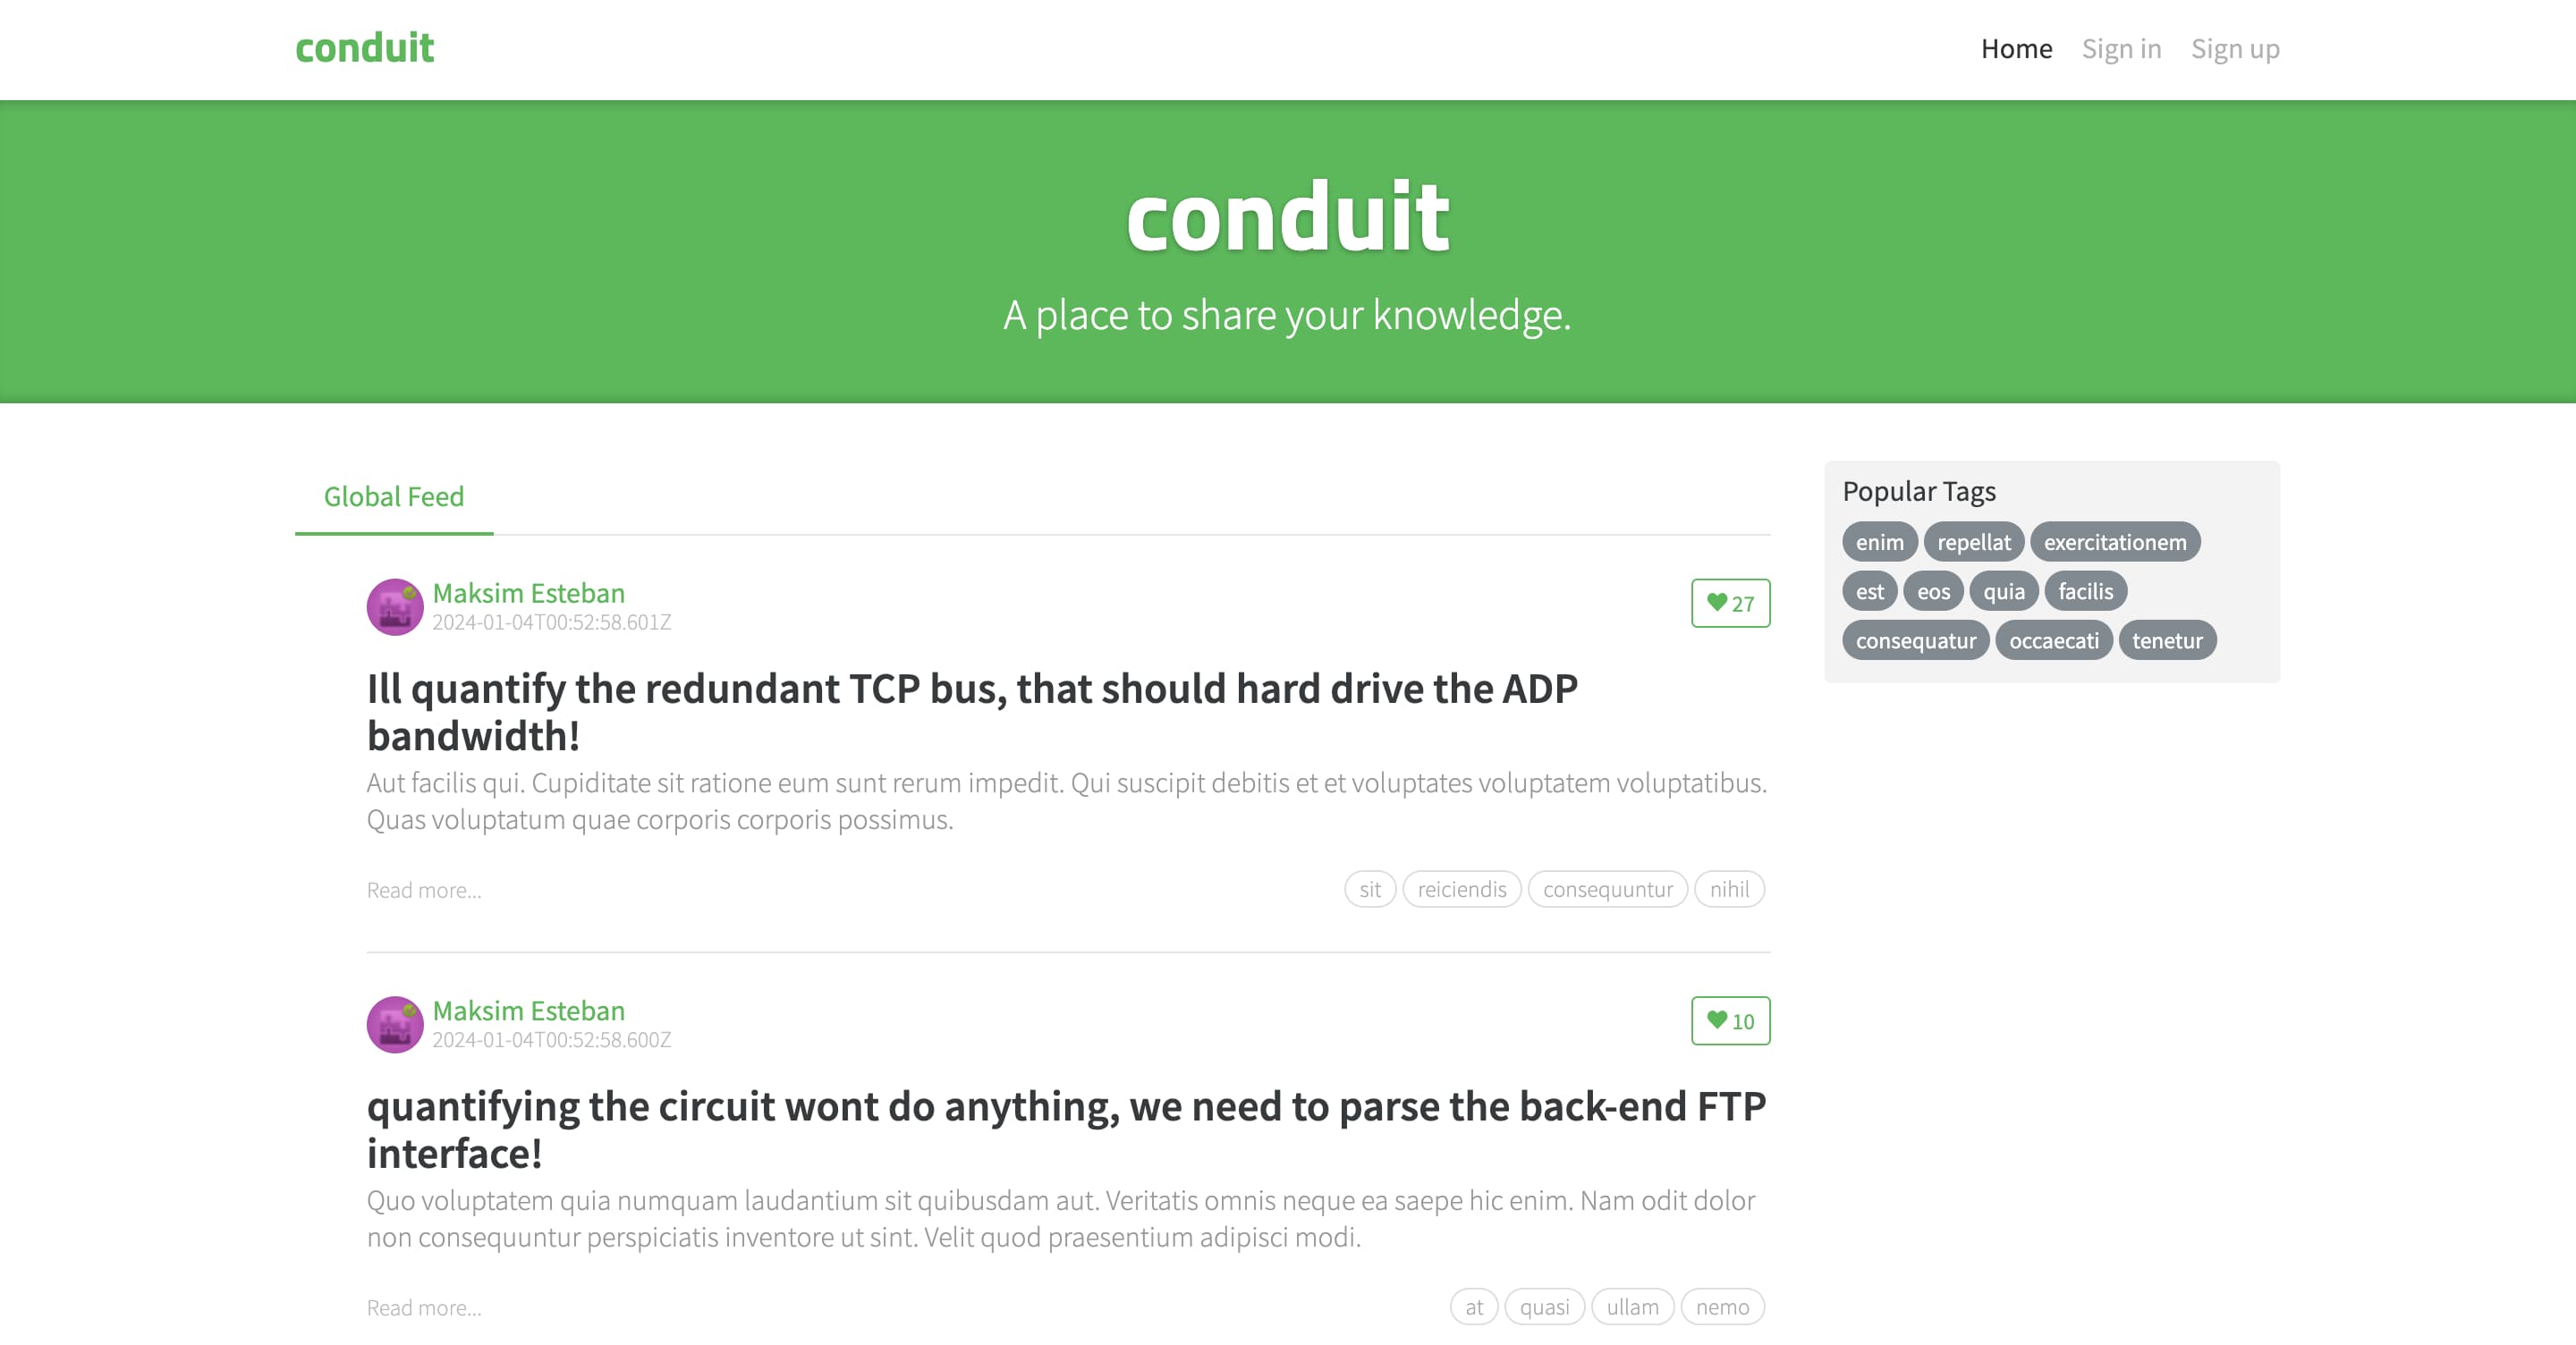 这是一个相当小的应用程序,所以我们将保持简单并避免过度分解。整个应用程序很可能只需要三个 layers:**App**、**Pages** 和 **Shared**。如果不是,我们将在过程中引入额外的 layers。准备好了吗? ### 从列出页面开始[](#从列出页面开始 "标题的直接链接") 如果我们查看上面的截图,我们可以至少假设以下页面: * 主页(文章流) * 登录和注册 * 文章阅读器 * 文章编辑器 * 用户资料查看器 * 用户资料编辑器(用户设置) 这些页面中的每一个都将成为 Pages *layer* 上的自己的 *slice*。回忆一下概览中的内容,slices 简单来说就是 layers 内部的文件夹,而 layers 简单来说就是具有预定义名称的文件夹,如 `pages`。 因此,我们的 Pages 文件夹将如下所示: ``` 📂 pages/ 📁 feed/ 📁 sign-in/ 📁 article-read/ 📁 article-edit/ 📁 profile/ 📁 settings/ ``` Feature-Sliced Design 与无规则代码结构的关键区别是页面不能相互引用。也就是说,一个页面不能从另一个页面导入代码。这是由于 **layers 上的导入规则**: *slice 中的模块(文件)只能在其他 slices 位于严格低于当前的 layers 时才能导入它们。* 在这种情况下,页面是一个 slice,所以这个页面内部的模块(文件)只能引用下层 layers 的代码,而不能引用同一 layer Pages 的代码。 ### 仔细查看 feed[](#仔细查看-feed "标题的直接链接")  *Anonymous user’s perspective*  *Authenticated user’s perspective* feed 页面上有三个动态区域: 1. 带有登录状态指示的登录链接 2. 触发 feed 中过滤的标签列表 3. 一个/两个文章 feeds,每篇文章都有一个点赞按钮 登录链接是所有页面通用的头部的一部分,我们将单独重新访问它。 #### 标签列表[](#标签列表 "标题的直接链接") 要构建标签列表,我们需要获取可用的标签,将每个标签渲染为芯片,并将选中的标签存储在客户端存储中。这些操作分别属于“API 交互”、“用户界面”和“存储”类别。在 Feature-Sliced Design 中,代码使用 *segments* 按目的分离。Segments 是 slices 中的文件夹,它们可以有描述目的的任意名称,但某些目的非常常见,以至于某些 segment 名称有约定: * 📂 `api/` 用于后端交互 * 📂 `ui/` 用于处理渲染和外观的代码 * 📂 `model/` 用于存储和业务逻辑 * 📂 `config/` 用于 feature flags、环境变量和其他形式的配置 我们将获取标签的代码放入 `api`,标签组件放入 `ui`,存储交互放入 `model`。 #### 文章[](#文章 "标题的直接链接") 使用相同的分组原则,我们可以将文章 feed 分解为相同的三个 segments: * 📂 `api/`: 获取带有点赞数的分页文章;点赞文章 * 📂 `ui/`: * 可以在选中标签时渲染额外选项卡的选项卡列表 * 单个文章 * 功能分页 * 📂 `model/`: 当前加载的文章和当前页面的客户端存储(如果需要) ### 重用通用代码[](#重用通用代码 "标题的直接链接") 大多数页面在意图上非常不同,但某些东西在整个应用程序中保持不变 — 例如,符合设计语言的 UI 套件,或后端上使用相同认证方法的 REST API 来完成所有事情的约定。由于 slices 旨在被隔离,代码重用由更低的 layer **Shared** 促进。 Shared 与其他 layers 不同,它包含 segments 而不是 slices。这样,Shared layer 可以被认为是 layer 和 slice 之间的混合体。 通常,Shared 中的代码不是提前计划的,而是在开发过程中提取的,因为只有在开发过程中才能明确哪些代码部分实际上是共享的。然而,记住哪种代码自然属于 Shared 仍然是有帮助的: * 📂 `ui/` — the UI kit, pure appearance, no business logic. For example, buttons, modal dialogs, form inputs. * 📂 `api/` — convenience wrappers around request making primitives (like `fetch()` on the Web) and, optionally, functions for triggering particular requests according to the backend specification. * 📂 `config/` — parsing environment variables * 📂 `i18n/` — configuration of language support * 📂 `router/` — routing primitives and route constants 这些只是 Shared 中 segment 名称的几个示例,但您可以省略其中任何一个或创建自己的。创建新 segments 时要记住的唯一重要事情是,segment 名称应该描述**目的(为什么),而不是本质(是什么)**。像 "components"、"hooks"、"modals" 这样的名称*不应该*使用,因为它们描述了这些文件是什么,但不能帮助在内部导航代码。这要求团队中的人在这样的文件夹中挖掘每个文件,并且也保持不相关的代码接近,这导致了重构影响的代码区域广泛,从而使代码审查和测试更加困难。 ### 定义严格的 public API[](#定义严格的-public-api "标题的直接链接") 在 Feature-Sliced Design 的上下文中,术语 *public API* 指的是 slice 或 segment 声明项目中的其他模块可以从它导入什么。例如,在 JavaScript 中,这可以是一个 `index.js` 文件,从 slice 中的其他文件重新导出对象。这使得在 slice 内部重构代码的自由度成为可能,只要与外部世界的契约(即 public API)保持不变。 对于没有 slices 的 Shared layer,通常为每个 segment 定义单独的 public API 比定义 Shared 中所有内容的一个单一索引更方便。这使得从 Shared 的导入按意图自然地组织。对于具有 slices 的其他 layers,情况相反 — 通常每个 slice 定义一个索引并让 slice 决定外部世界未知的自己的 segments 集合更实用,因为其他 layers 通常有更少的导出。 我们的 slices/segments 将以以下方式相互出现: ``` 📂 pages/ 📂 feed/ 📄 index 📂 sign-in/ 📄 index 📂 article-read/ 📄 index 📁 … 📂 shared/ 📂 ui/ 📄 index 📂 api/ 📄 index 📁 … ``` 像 `pages/feed` 或 `shared/ui` 这样的文件夹内部的任何内容只有这些文件夹知道,其他文件不应该依赖这些文件夹的内部结构。 ### UI 中的大型重用块[](#ui-中的大型重用块 "标题的直接链接") 早些时候我们记录了要重新访问出现在每个页面上的头部。在每个页面上从头开始重建它是不切实际的,所以想要重用它是很自然的。我们已经有 Shared 来促进代码重用,然而,在 Shared 中放置大型 UI 块有一个警告 — Shared layer 不应该了解上面的任何 layers。 在 Shared 和 Pages 之间有三个其他 layers:Entities、Features 和 Widgets。某些项目可能在这些 layers 中有他们在大型可重用块中需要的东西,这意味着我们不能将该可重用块放在 Shared 中,否则它将从上层 layers 导入,这是被禁止的。这就是 Widgets layer 的用武之地。它位于 Shared、Entities 和 Features 之上,所以它可以使用它们所有。 在我们的情况下,头部非常简单 — 它是一个静态 logo 和顶级导航。导航需要向 API 发出请求以确定用户当前是否已登录,但这可以通过从 `api` segment 的简单导入来处理。因此,我们将把我们的头部保留在 Shared 中。 ### 仔细查看带有表单的页面[](#仔细查看带有表单的页面 "标题的直接链接") 让我们也检查一个用于编辑而不是阅读的页面。例如,文章编写器: 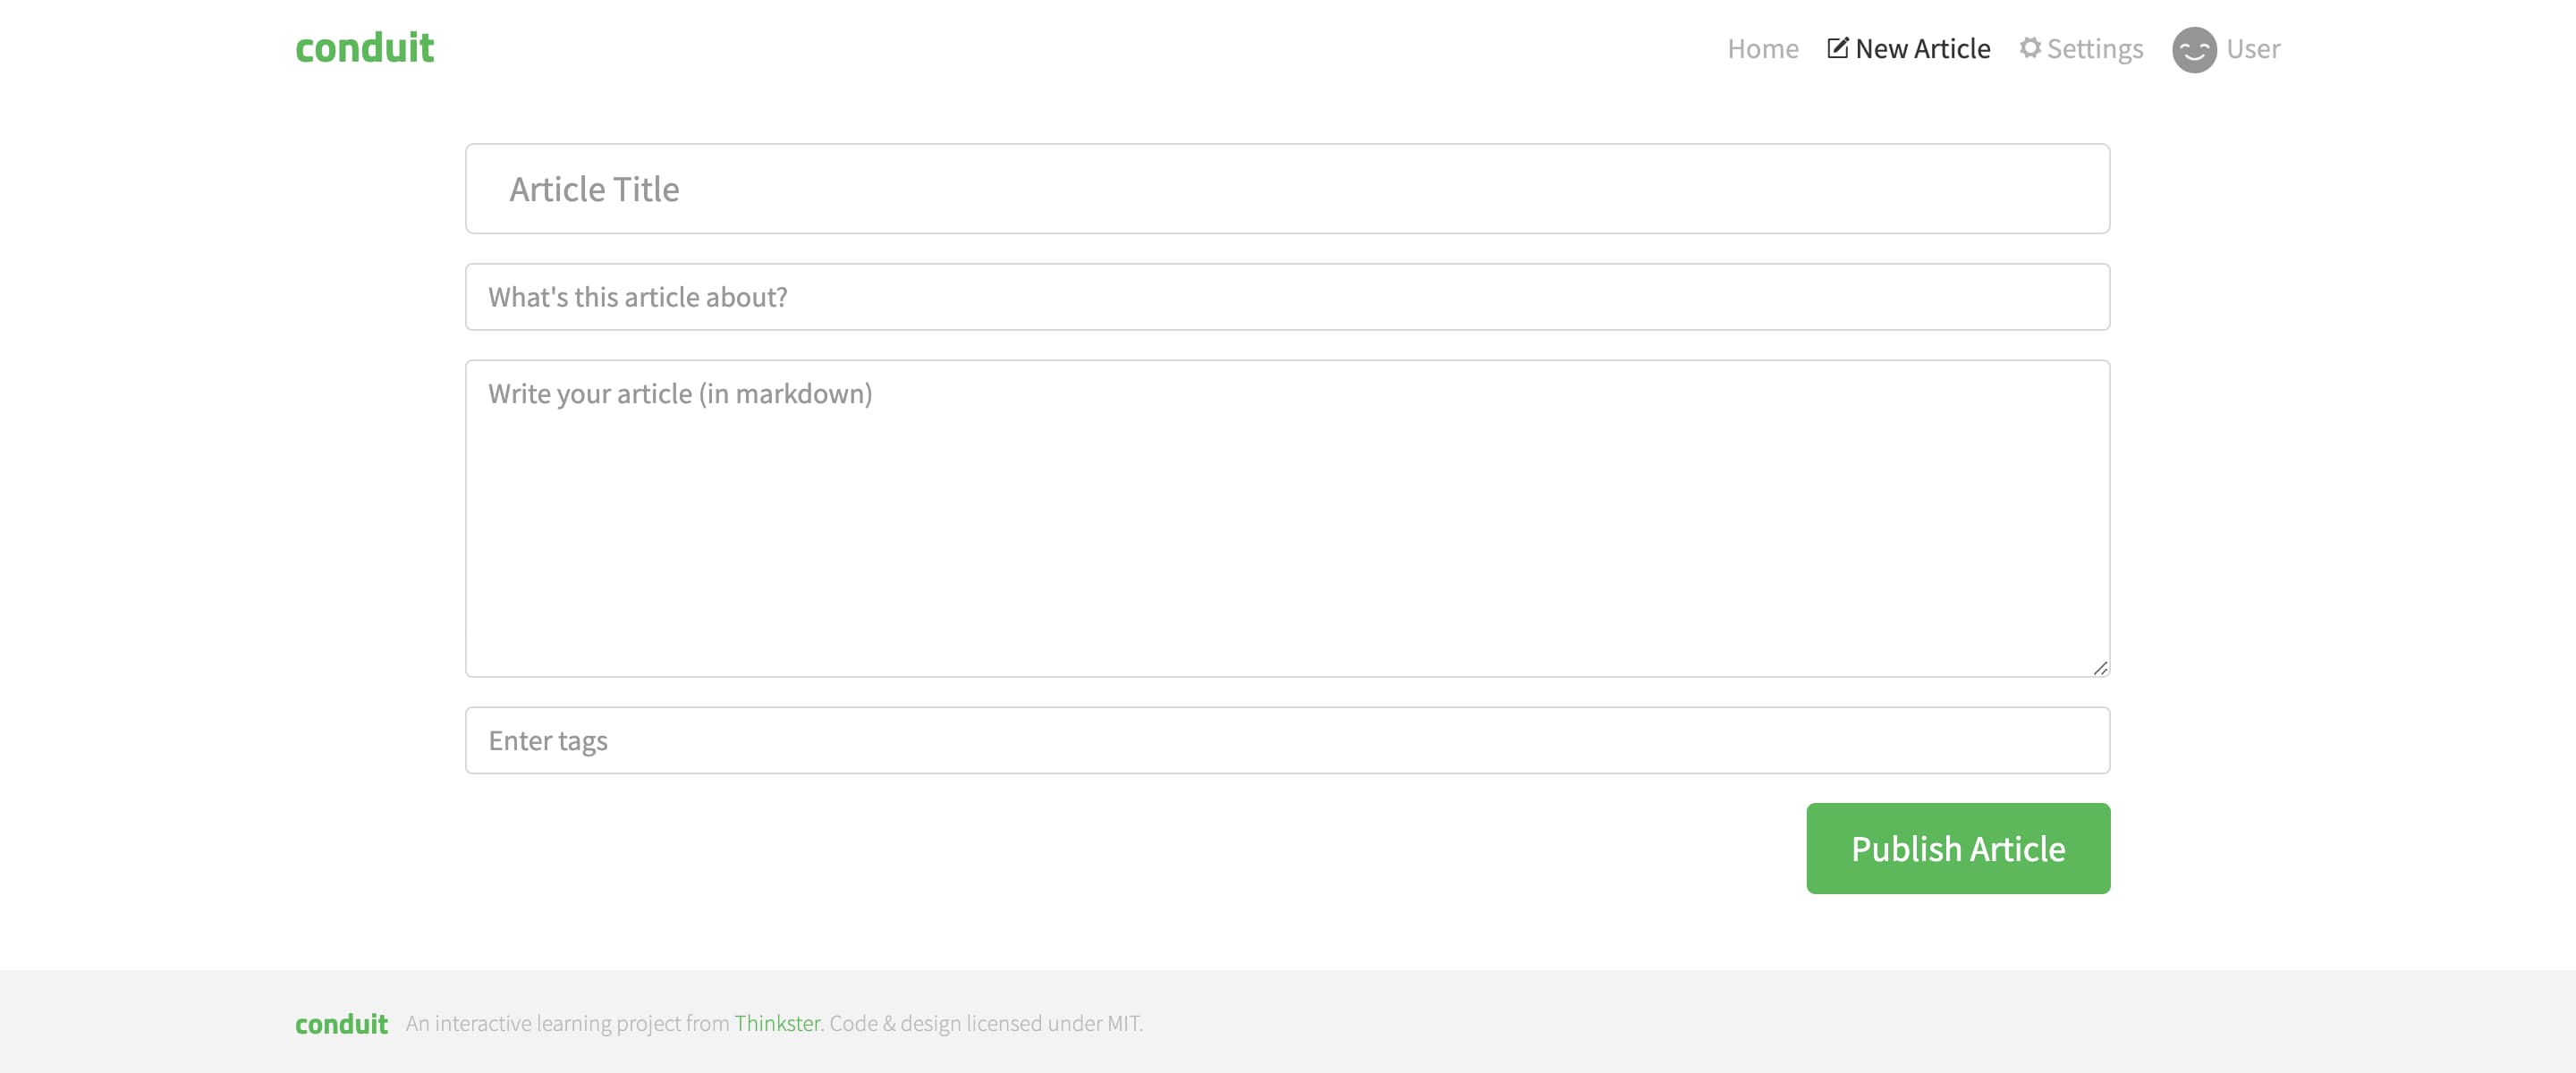 它看起来微不足道,但包含了我们尚未探索的应用程序开发的几个方面 — 表单验证、错误状态和数据持久化。 如果我们要构建这个页面,我们会从 Shared 中获取一些输入和按钮,并在此页面的 `ui` segment 中组合一个表单。然后,在 `api` segment 中,我们将定义一个变更请求以在后端创建文章。 为了在发送之前验证请求,我们需要一个验证模式,一个好地方是 `model` segment,因为它是数据模型。在那里我们将产生错误消息并使用 `ui` segment 中的另一个组件显示它们。 为了改善用户体验,我们还可以持久化输入以防止意外数据丢失。这也是 `model` segment 的工作。 ### 总结[](#总结 "标题的直接链接") 我们已经检查了几个页面并为我们的应用程序概述了初步结构: 1. Shared layer 1. `ui` 将包含我们可重用的 UI 套件 2. `api` 将包含我们与后端的原始交互 3. 其余将根据需要安排 2. Pages layer — 每个页面都是一个单独的 slice 1. `ui` 将包含页面本身及其所有部分 2. `api` 将包含更专门的数据获取,使用 `shared/api` 3. `model` 可能包含我们将显示的数据的客户端存储 让我们开始构建吧! ## 第二部分。在代码中[](#第二部分在代码中 "标题的直接链接") 现在我们有了计划,让我们付诸实践。我们将使用 React 和 [Remix](https://remix.run)。 有一个为此项目准备的模板,从 GitHub 克隆它以获得先机:
conduit
A place to share your knowledge.
{article.author.username}
{new Date(article.createdAt).toLocaleDateString(undefined, {
dateStyle: "long",
})}
{article.title}
{article.description}
Read more...-
{article.tagList.map((tag) => (
- {tag} ))}
conduit
A place to share your knowledge.
{articles.articles.map((article) => (
conduit
A place to share your knowledge.
{articles.articles.map((article) => (
Popular Tags
conduit
A place to share your knowledge.
{articles.articles.map((article) => (
Popular Tags
Sign up
Have an account?
{registerData?.error && (-
{registerData.error.errors.body.map((error) => (
- {error} ))}
Sign in
Need an account?
{signInData?.error && (-
{signInData.error.errors.body.map((error) => (
- {error} ))}
Popular Tags
conduit
A place to share your knowledge.
{article.author.username}
{new Date(article.createdAt).toLocaleDateString(undefined, {
dateStyle: "long",
})}
{article.title}
{article.description}
Read more...-
{article.tagList.map((tag) => (
- {tag} ))}
{article.article.title}
{article.article.body}
-
{article.article.tagList.map((tag) => (
- {tag} ))}
{currentUser !== null ? (
) : (
)}
{comments.comments.map((comment) => (
 {comment.author.username}
{comment.createdAt}
{comment.author.username === currentUser?.username && (
)}
))}
{comment.author.username}
{comment.createdAt}
{comment.author.username === currentUser?.username && (
)}
))}
);
}
```
这样我们的文章阅读器也完成了!关注作者、点赞帖子和留下评论的按钮现在应该能按预期工作。
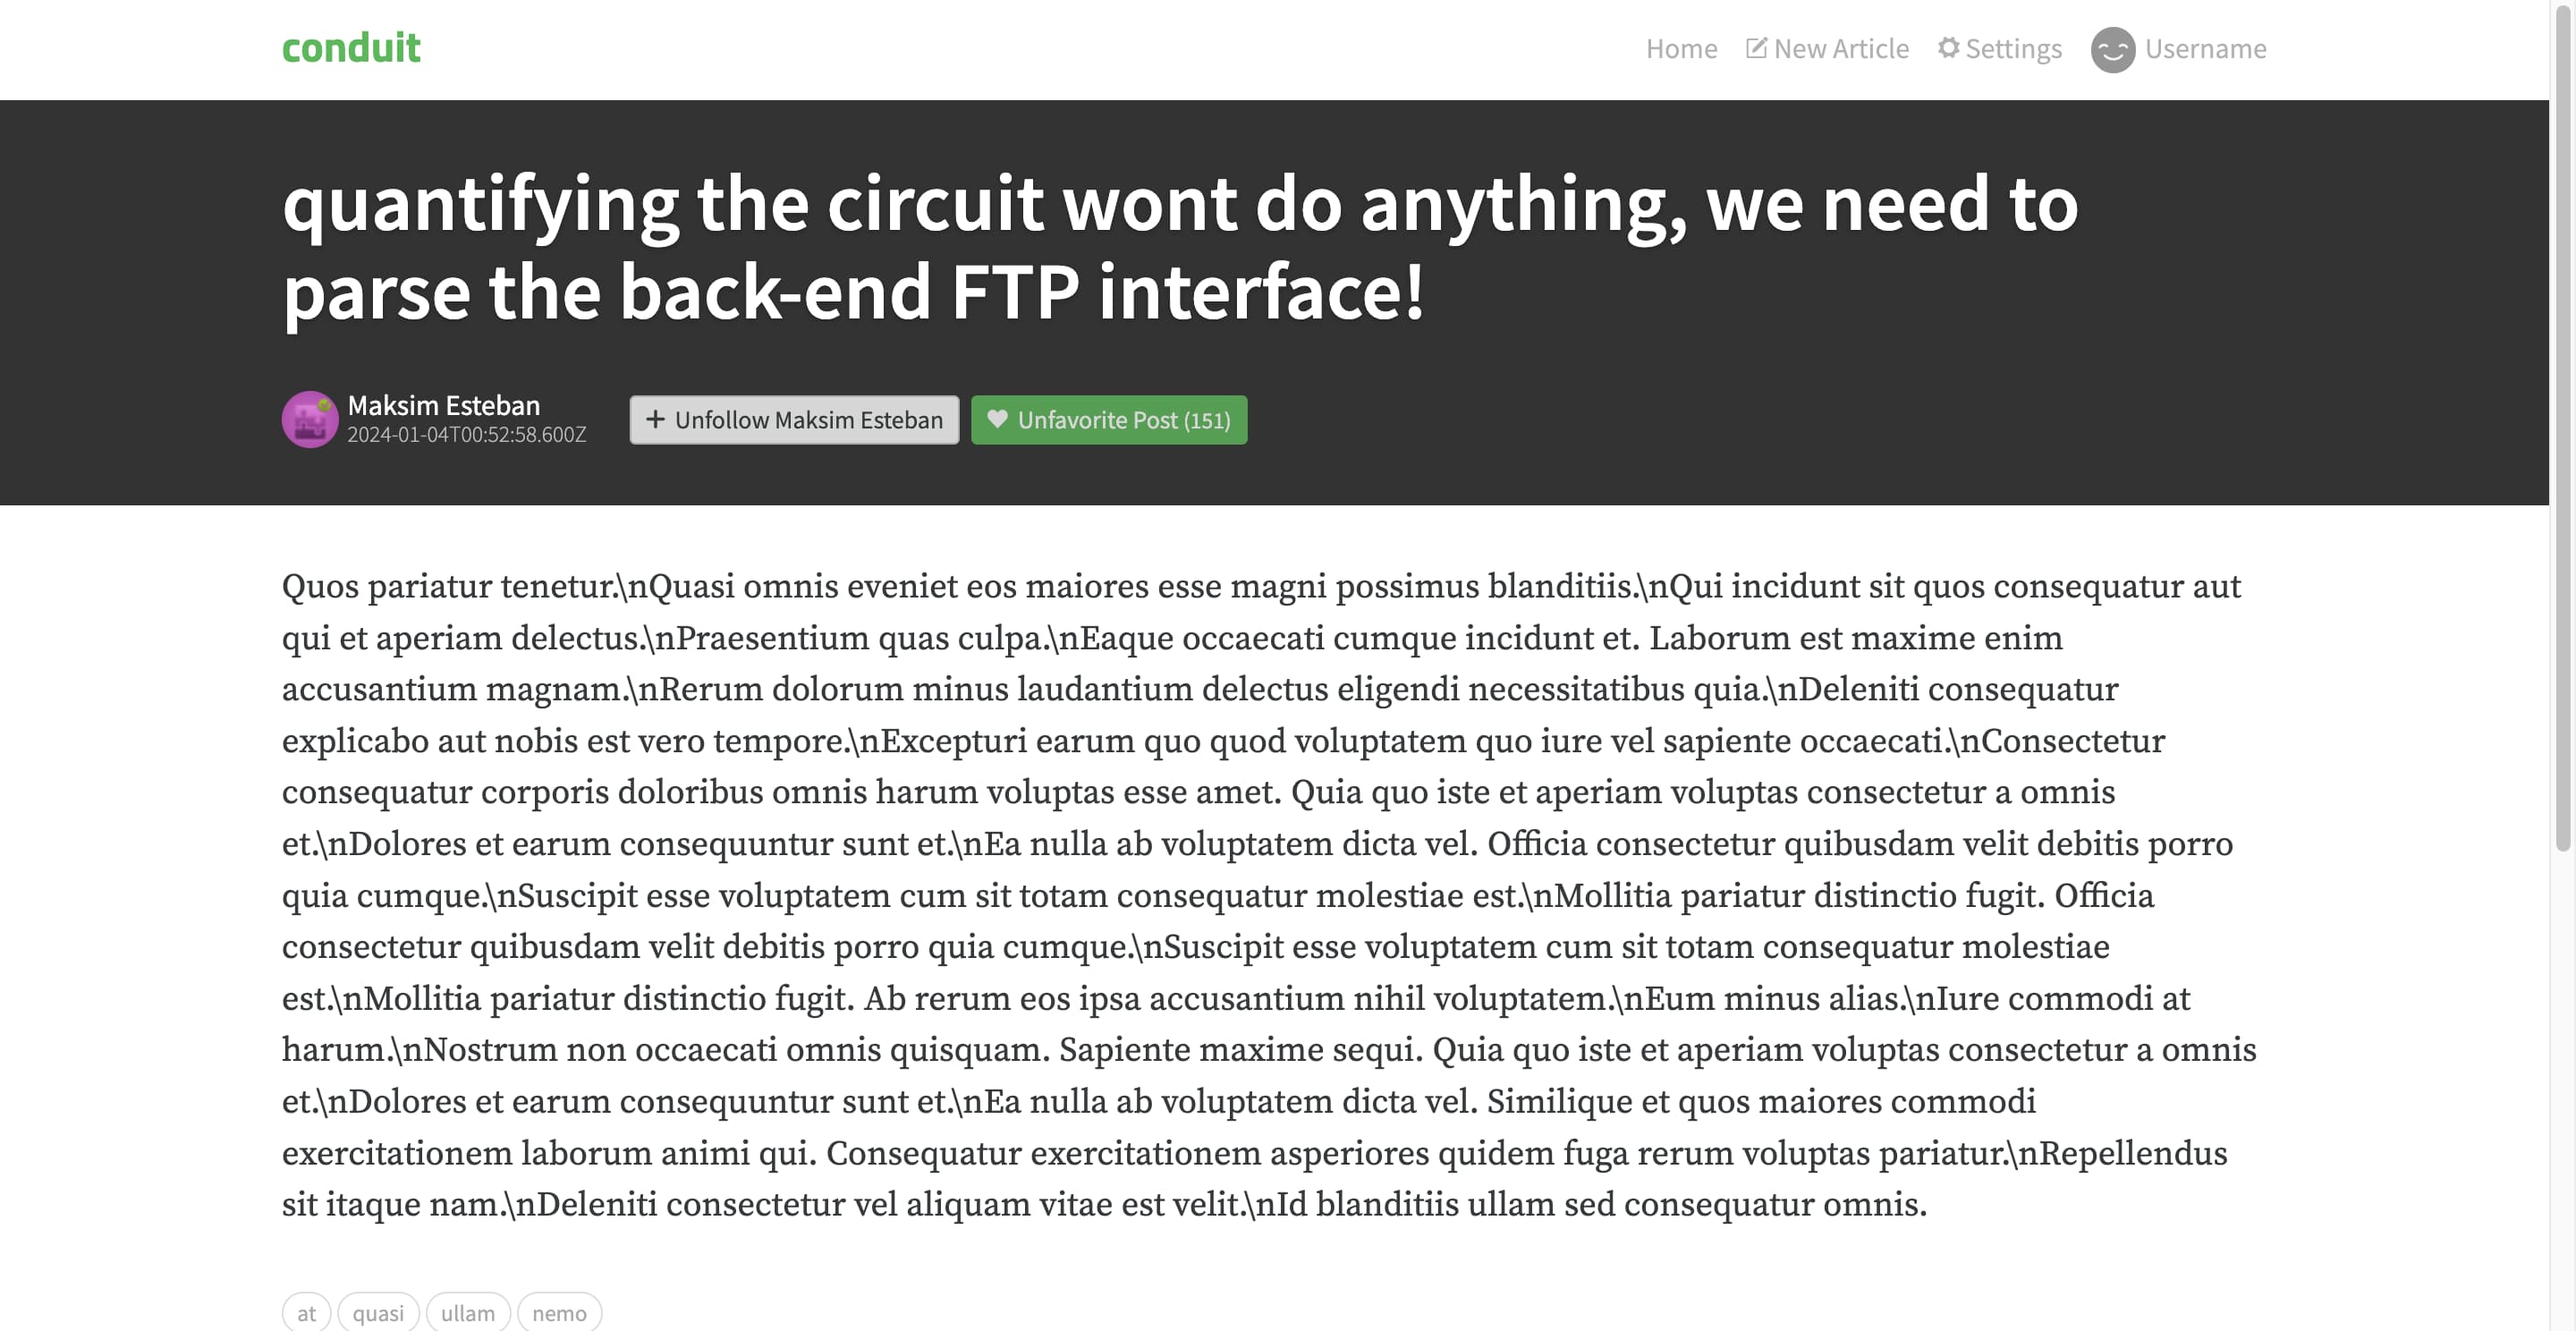
Article reader with functioning buttons to like and follow
### 文章编辑器[](#文章编辑器 "标题的直接链接")
这是我们将在本教程中涵盖的最后一个页面,这里最有趣的部分是我们将如何验证表单数据。
页面本身,`article-edit/ui/ArticleEditPage.tsx`,将非常简单,额外的复杂性被存储到其他两个组件中:
pages/article-edit/ui/ArticleEditPage.tsx
```
import { Form, useLoaderData } from "@remix-run/react";
import type { loader } from "../api/loader";
import { TagsInput } from "./TagsInput";
import { FormErrors } from "./FormErrors";
export function ArticleEditPage() {
const article = useLoaderDataSign in or Sign up to add comments on this article.
{comment.body}
-
{actionData.errors.map((error) => (
- {error} ))}
{tagListState.map((tag) => (
[" ", "Enter"].includes(e.key) && removeTag(tag)
}
onClick={() => removeTag(tag)}
>{" "}
{tag}
))}
);
}
```
现在,API 部分。loader 应该查看 URL,如果它包含文章 slug,那意味着我们正在编辑现有文章,应该加载其数据。否则,返回空。让我们创建该 loader:
pages/article-edit/api/loader.ts
```
import { json, type LoaderFunctionArgs } from "@remix-run/node";
import type { FetchResponse } from "openapi-fetch";
import { GET, requireUser } from "shared/api";
async function throwAnyErrors这是最简单的解决方案,但很快就会变得繁琐,如果你没有类型安全,很容易忘记。它也与Shared中API客户端的中间件模式不兼容。 2. **通过上下文或像`localStorage`这样的全局存储将token暴露给整个应用程序**
检索token的键将保存在`shared/api`中,以便API客户端可以访问它。token的响应式存储将从用户实体导出,上下文提供者(如果需要)将在App层设置。这为设计API客户端提供了更多自由,但是,这会对更高层级提供上下文创建隐式依赖。遵循这种方法时,如果上下文或`localStorage`没有正确设置,请考虑提供有用的错误消息。 3. **每次token更改时将其注入API客户端**
如果你的存储是响应式的,你可以创建一个订阅,每次实体中的存储更改时都会更新API客户端的token存储。这与前一个解决方案类似,因为它们都对更高层级创建隐式依赖,但这个更具命令性("推送"),而前一个更具声明性("拉取")。 一旦你克服了暴露存储在实体模型中的token的挑战,你就可以编码更多与token管理相关的业务逻辑。例如,`model`段可以包含在一定时间后使token失效的逻辑,或在token过期时刷新token的逻辑。要实际向后端发出请求,请使用用户实体的`api`段或`shared/api`。 ### 在页面/小部件中(不推荐)[](#在页面小部件中不推荐 "标题的直接链接") 不建议在页面或小部件中存储像访问token这样的应用程序范围状态。避免将token存储放在登录页面的`model`段中,而是从前两个解决方案中选择:Shared或Entities。 ## 登出和 token 失效[](#登出和-token-失效 "标题的直接链接") 通常,应用程序没有专门的登出页面,但登出功能仍然非常重要。它包括对后端的经过身份验证的请求和对 token 存储的更新。 如果您将所有请求存储在 `shared/api` 中,请将登出请求函数保留在那里,靠近登录函数。否则,请考虑将登出请求函数保留在触发它的按钮旁边。例如,如果您有一个出现在每个页面上并包含登出链接的头部 widget,请将该请求放在该 widget 的 `api` segment 中。 token 存储的更新必须从登出按钮的位置触发,比如头部 widget。您可以在该 widget 的 `model` segment 中组合请求和存储更新。 ### 自动登出[](#自动登出 "标题的直接链接") 不要忘记为登出请求失败或刷新登录 token 请求失败时构建故障保护。在这两种情况下,您都应该清除 token 存储。如果您将 token 保存在 Entities 中,此代码可以放在 `model` segment 中,因为它是纯业务逻辑。如果您将 token 保存在 Shared 中,将此逻辑放在 `shared/api` 中可能会使 segment 膨胀并稀释其目的。如果您注意到您的 API segment 包含几个不相关的东西,请考虑将 token 管理逻辑拆分到另一个 segment 中,例如 `shared/auth`。 --- # 自动完成 WIP 文章正在编写中 为了使文章更快发布,您可以: * 📢 分享您的反馈[在文章中(评论/表情反应)](https://github.com/feature-sliced/documentation/issues/170) * 💬 收集相关的[来自聊天的主题相关资料](https://t.me/feature_sliced) * ⚒️ 贡献[以任何其他方式](https://github.com/feature-sliced/documentation/blob/master/CONTRIBUTING.md)
*🍰 Stay tuned!* > 关于按层分解 ## 另请参阅[](#另请参阅 "标题的直接链接") * [(讨论) 关于将方法论应用于加载字典的选择](https://github.com/feature-sliced/documentation/discussions/65#discussioncomment-480807) --- # 浏览器 API WIP 文章正在编写中 为了使文章更快发布,您可以: * 📢 分享您的反馈[在文章中(评论/表情反应)](https://github.com/feature-sliced/documentation/issues/197) * 💬 收集相关的[来自聊天的主题相关资料](https://t.me/feature_sliced) * ⚒️ 贡献[以任何其他方式](https://github.com/feature-sliced/documentation/blob/master/CONTRIBUTING.md)
*🍰 Stay tuned!* > 关于使用浏览器 API:localStorage、音频 API、蓝牙 API 等。 > > 您可以向 [@alex\_novi](https://t.me/alex_novich) 询问更多详细信息 --- # CMS WIP 文章正在编写中 为了使文章更快发布,您可以: * 📢 分享您的反馈[在文章中(评论/表情反应)](https://github.com/feature-sliced/documentation/issues/172) * 💬 收集相关的[来自聊天的主题相关资料](https://t.me/feature_sliced) * ⚒️ 贡献[以任何其他方式](https://github.com/feature-sliced/documentation/blob/master/CONTRIBUTING.md)
*🍰 Stay tuned!* ## 功能可能不同[](#功能可能不同 "标题的直接链接") 在一些项目中,所有功能都集中在来自服务器的数据中 >
*🍰 Stay tuned!* > 错误、警告、通知…… --- # 国际化 WIP 文章正在编写中 为了使文章更快发布,您可以: * 📢 分享您的反馈[在文章中(评论/表情反应)](https://github.com/feature-sliced/documentation/issues/171) * 💬 收集相关的[来自聊天的主题相关资料](https://t.me/feature_sliced) * ⚒️ 贡献[以任何其他方式](https://github.com/feature-sliced/documentation/blob/master/CONTRIBUTING.md)
*🍰 Stay tuned!* ## 在哪里放置它?如何使用它?[](#在哪里放置它如何使用它 "标题的直接链接") *
*🍰 Stay tuned!* > 关于在应用程序中初始化指标的方法 --- # 单体仓库 WIP 文章正在编写中 为了使文章更快发布,您可以: * 📢 分享您的反馈[在文章中(评论/表情反应)](https://github.com/feature-sliced/documentation/issues/221) * 💬 收集相关的[来自聊天的主题相关资料](https://t.me/feature_sliced) * ⚒️ 贡献[以任何其他方式](https://github.com/feature-sliced/documentation/blob/master/CONTRIBUTING.md)
*🍰 Stay tuned!* > 关于单体仓库的适用性,关于 bff,关于微应用 ## 另请参阅[](#另请参阅 "标题的直接链接") * [(讨论) 关于单体仓库和插件包](https://github.com/feature-sliced/documentation/discussions/50) * [(Thread) 关于单体仓库的应用](https://t.me/feature_sliced/2412) --- # 页面布局 本指南探讨了\_页面布局\_的抽象 — 当多个页面共享相同的整体结构,仅在主要内容上有所不同时。 信息 本指南没有涵盖您的问题?请通过在本文上留下反馈(右侧的蓝色按钮)来发布您的问题,我们将考虑扩展本指南! ## 简单布局[](#简单布局 "标题的直接链接") 最简单的布局可以在此页面上看到。它有一个带有站点导航的头部、两个侧边栏和一个带有外部链接的页脚。没有复杂的业务逻辑,唯一的动态部分是侧边栏和头部右侧的切换器。这样的布局可以完全放置在 `shared/ui` 或 `app/layouts` 中,通过 props 填充侧边栏的内容: shared/ui/layout/Layout.tsx ``` import { Link, Outlet } from "react-router-dom"; import { useThemeSwitcher } from "./useThemeSwitcher"; export function Layout({ siblingPages, headings }) { const [theme, toggleTheme] = useThemeSwitcher(); return (
这对于支持嵌套的路由器来说很棒,因为您可以将某些路由分组并仅对它们应用布局。 2. **直接复制粘贴**
抽象代码的冲动往往被过度高估。对于很少更改的布局来说尤其如此。在某个时候,如果其中一个页面需要更改,您可以简单地进行更改,而不会不必要地影响其他页面。如果您担心有人可能忘记更新其他页面,您总是可以留下描述页面之间关系的注释。 如果上述都不适用,有两种解决方案可以在布局中包含 widget: 1. **使用 render props 或 slots**
大多数框架允许您从外部传递一段 UI。在 React 中,这被称为 [render props](https://www.patterns.dev/react/render-props-pattern/),在 Vue 中被称为 [slots](https://vuejs.org/guide/components/slots)。 2. **将布局移动到 App 层**
您也可以将布局存储在 App 层,例如在 `app/layouts` 中,并组合您想要的任何 widgets。 ## 延伸阅读[](#延伸阅读 "标题的直接链接") * 在[教程](/documentation/zh/docs/get-started/tutorial.md)中有一个如何使用 React 和 Remix(相当于 React Router)构建带有身份验证的布局的示例。 --- # 桌面/触摸平台 WIP 文章正在编写中 为了使文章更快发布,您可以: * 📢 分享您的反馈[在文章中(评论/表情反应)](https://github.com/feature-sliced/documentation/issues/198) * 💬 收集相关的[来自聊天的主题相关资料](https://t.me/feature_sliced) * ⚒️ 贡献[以任何其他方式](https://github.com/feature-sliced/documentation/blob/master/CONTRIBUTING.md)
*🍰 Stay tuned!* > 关于方法论在桌面/触摸平台上的应用 --- # SSR WIP 文章正在编写中 为了使文章更快发布,您可以: * 📢 分享您的反馈[在文章中(评论/表情反应)](https://github.com/feature-sliced/documentation/issues/173) * 💬 收集相关的[来自聊天的主题相关资料](https://t.me/feature_sliced) * ⚒️ 贡献[以任何其他方式](https://github.com/feature-sliced/documentation/blob/master/CONTRIBUTING.md)
*🍰 Stay tuned!* > 关于使用方法论实现 SSR --- # 主题 WIP 文章正在编写中 为了使文章更快发布,您可以: * 📢 分享您的反馈[在文章中(评论/表情反应)](https://github.com/feature-sliced/documentation/issues/207) * 💬 收集相关的[来自聊天的主题相关资料](https://t.me/feature_sliced) * ⚒️ 贡献[以任何其他方式](https://github.com/feature-sliced/documentation/blob/master/CONTRIBUTING.md)
*🍰 Stay tuned!* ## 我应该把主题和调色板的工作放在哪里?[](#我应该把主题和调色板的工作放在哪里 "标题的直接链接") >
您可以让您的类型接受类型参数作为与其他实体连接的插槽,甚至可以对这些插槽施加约束。例如: entities/song/model/song.ts ``` interface Song
要在 FSD 中的实体之间进行交叉导入,您可以为每个将要交叉导入的 slice 使用特殊的公共 API。例如,如果我们有实体 `song`、`artist` 和 `playlist`,后两者需要引用 `song`,我们可以在 `song` 实体中使用 `@x` 符号为它们创建两个特殊的公共 API: * 📂 entities * 📂 song * 📂 @x * 📄 artist.ts (供 `artist` 实体导入的公共 API) * 📄 playlist.ts (供 `playlist` 实体导入的公共 API) * 📄 index.ts (常规公共 API) 文件 `📄 entities/song/@x/artist.ts` 的内容类似于 `📄 entities/song/index.ts`: entities/song/@x/artist.ts ``` export type { Song } from "../model/song.ts"; ``` 然后 `📄 entities/artist/model/artist.ts` 可以像这样导入 `Song`: entities/artist/model/artist.ts ``` import type { Song } from "entities/song/@x/artist"; export interface Artist { name: string; songs: Array
*🍰 Stay tuned!* > Figma、品牌 uikit、模板、品牌适应性 ## 另请参阅[](#另请参阅 "标题的直接链接") * [(Thread) 关于白标(品牌)项目的应用](https://t.me/feature_sliced/1543) * [(演示文稿) 关于白标应用程序和设计](http://yadi.sk/i/5IdhzsWrpO3v4Q) --- # 交叉导入 WIP 文章正在编写中 为了使文章更快发布,您可以: * 📢 分享您的反馈[在文章中(评论/表情反应)](https://github.com/feature-sliced/documentation/issues/220) * 💬 收集相关的[来自聊天的主题相关资料](https://t.me/feature_sliced) * ⚒️ 贡献[以任何其他方式](https://github.com/feature-sliced/documentation/blob/master/CONTRIBUTING.md)
*🍰 Stay tuned!* > 当层或抽象开始承担超出其应有责任时,就会出现交叉导入。这就是为什么方法论识别出新的层,允许您解耦这些交叉导入 ## 另请参阅[](#另请参阅 "标题的直接链接") * [(Thread) 关于交叉端口的所谓不可避免性](https://t.me/feature_sliced/4515) * [(Thread) 关于解决实体中的交叉端口](https://t.me/feature_sliced/3678) * [(Thread) 关于交叉导入和责任](https://t.me/feature_sliced/3287) * [(Thread) 关于 segments 之间的导入](https://t.me/feature_sliced/4021) * [(Thread) 关于 shared 内部的交叉导入](https://t.me/feature_sliced/3618) --- # 去分段化 WIP 文章正在编写中 为了使文章更快发布,您可以: * 📢 分享您的反馈[在文章中(评论/表情反应)](https://github.com/feature-sliced/documentation/issues/148) * 💬 收集相关的[来自聊天的主题相关资料](https://t.me/feature_sliced) * ⚒️ 贡献[以任何其他方式](https://github.com/feature-sliced/documentation/blob/master/CONTRIBUTING.md)
*🍰 Stay tuned!* ## 情况[](#情况 "标题的直接链接") 在项目中经常出现这样的情况:与主题领域中特定域相关的模块被不必要地去分段化并分散在项目周围 ``` ├── components/ | ├── DeliveryCard | ├── DeliveryChoice | ├── RegionSelect | ├── UserAvatar ├── actions/ | ├── delivery.js | ├── region.js | ├── user.js ├── epics/ | ├── delivery.js | ├── region.js | ├── user.js ├── constants/ | ├── delivery.js | ├── region.js | ├── user.js ├── helpers/ | ├── delivery.js | ├── region.js | ├── user.js ├── entities/ | ├── delivery/ | | ├── getters.js | | ├── selectors.js | ├── region/ | ├── user/ ``` ## 问题[](#问题 "标题的直接链接") 该问题至少表现为违反了**高内聚**原则和过度拉伸**变更轴** ## 如果您忽略它[](#如果您忽略它 "标题的直接链接") * 如果需要涉及逻辑,例如交付 - 我们必须记住它位于多个地方,并涉及代码中的多个地方 - 这不必要地拉伸了我们的**变更轴** * 如果我们需要研究用户的逻辑,我们将不得不遍历整个项目来详细研究**actions、epics、constants、entities、components** - 而不是将其放在一个地方 * 隐式连接和不断增长的主题领域的不可控性 * 使用这种方法,眼睛经常会模糊,您可能不会注意到我们如何"为了常量而创建常量",在相应的项目目录中创建垃圾场 ## 解决方案[](#解决方案 "标题的直接链接") 将与特定域/用户案例相关的所有模块 - 直接彼此相邻放置 这样,在研究特定模块时,其所有组件都并排放置,而不是分散在项目周围 > 它还增加了代码库的可发现性和清晰度以及模块之间的关系 ``` - ├── components/ - | ├── DeliveryCard - | ├── DeliveryChoice - | ├── RegionSelect - | ├── UserAvatar - ├── actions/ - | ├── delivery.js - | ├── region.js - | ├── user.js - ├── epics/{...} - ├── constants/{...} - ├── helpers/{...} ├── entities/ | ├── delivery/ + | | ├── ui/ # ~ components/ + | | | ├── card.js + | | | ├── choice.js + | | ├── model/ + | | | ├── actions.js + | | | ├── constants.js + | | | ├── epics.js + | | | ├── getters.js + | | | ├── selectors.js + | | ├── lib/ # ~ helpers | ├── region/ | ├── user/ ``` ## See also[](#see-also "标题的直接链接") * [(Article) About Low Coupling and High Cohesion clearly](https://enterprisecraftsmanship.com/posts/cohesion-coupling-difference/) * [(Article) Low Coupling and High Cohesion. The Law of Demeter](https://medium.com/german-gorelkin/low-coupling-high-cohesion-d36369fb1be9) --- # 路由 WIP 文章正在编写中 为了使文章更快发布,您可以: * 📢 分享您的反馈[在文章中(评论/表情反应)](https://github.com/feature-sliced/documentation/issues/169) * 💬 收集相关的[来自聊天的主题相关资料](https://t.me/feature_sliced) * ⚒️ 贡献[以任何其他方式](https://github.com/feature-sliced/documentation/blob/master/CONTRIBUTING.md)
*🍰 Stay tuned!* ## 情况[](#情况 "标题的直接链接") 页面的 URL 在页面下方的层中硬编码 entities/post/card ```
点击蓝色箭头打开文件夹。 📁 src * 📁 actions * 📁 product * 📁 order * 📁 api * 📁 components * 📁 containers * 📁 constants * 📁 i18n * 📁 modules * 📁 helpers * 📁 routes * 📁 products.jsx * 📄 products.\[id].jsx * 📁 utils * 📁 reducers * 📁 selectors * 📁 styles * 📄 App.jsx * 📄 index.js ## 在您开始之前[](#before-you-start "标题的直接链接") 在考虑切换到Feature-Sliced Design时,向团队提出的最重要问题是——\_你真的需要它吗?\_我们喜爱Feature-Sliced Design,但即使是我们也认识到一些项目没有它也完全可以。 以下是考虑进行切换的一些原因: 1. 新团队成员抱怨很难达到高效水平 2. 修改代码的一部分**经常**导致另一个不相关的部分出现问题 3. 由于需要考虑的事情太多,添加新功能变得困难 **避免违背队友意愿切换到FSD**,即使你是负责人。
首先,说服你的队友,让他们相信好处超过了迁移成本和学习新架构而不是既定架构的成本。 还要记住,任何类型的架构更改都不会立即被管理层观察到。在开始之前确保他们支持这种切换,并向他们解释为什么这可能对项目有益。 提示 如果你需要帮助说服项目经理FSD是有益的,请考虑以下几点: 1. 迁移到FSD可以增量进行,因此不会停止新功能的开发 2. 良好的架构可以显著减少新开发者需要变得高效的时间 3. FSD是一个有文档的架构,因此团队不必持续花时间维护自己的文档 *** 如果你决定开始迁移,那么你想要做的第一件事是为`📁 src`设置一个别名。稍后引用顶级文件夹时会很有帮助。在本指南的其余部分,我们将考虑`@`作为`./src`的别名。 ## 步骤1. 按页面划分代码[](#divide-code-by-pages "标题的直接链接") 大多数自定义架构已经有按页面的划分,无论逻辑大小如何。如果你已经有`📁 pages`,可以跳过此步骤。 如果你只有`📁 routes`,创建`📁 pages`并尝试从`📁 routes`中移动尽可能多的组件代码。理想情况下,你会有一个小的路由和一个较大的页面。在移动代码时,为每个页面创建一个文件夹并添加一个索引文件: 备注 现在,如果你的页面相互引用是可以的。你可以稍后处理这个问题,但现在,专注于建立突出的按页面划分。 Route file: src/routes/products.\[id].js ``` export { ProductPage as default } from "@/pages/product" ``` Page index file: src/pages/product/index.js ``` export { ProductPage } from "./ProductPage.jsx" ``` Page component file: src/pages/product/ProductPage.jsx ``` export function ProductPage(props) { return ; } ``` ## 步骤2. 将其他所有内容与页面分离[](#separate-everything-else-from-pages "标题的直接链接") 创建一个文件夹`📁 src/shared`,并将所有不从`📁 pages`或`📁 routes`导入的内容移动到那里。创建一个文件夹`📁 src/app`,并将所有导入页面或路由的内容移动到那里,包括路由本身。 记住Shared层没有切片,所以段之间相互导入是可以的。 You should end up with a file structure like this: 📁 src * 📁 app * 📁 routes * 📄 products.jsx * 📄 products.\[id].jsx * 📄 App.jsx * 📄 index.js * 📁 pages * 📁 product * 📁 ui * 📄 ProductPage.jsx * 📄 index.js * 📁 catalog * 📁 shared * 📁 actions * 📁 api * 📁 components * 📁 containers * 📁 constants * 📁 i18n * 📁 modules * 📁 helpers * 📁 utils * 📁 reducers * 📁 selectors * 📁 styles ## 步骤3. 处理页面间的交叉导入[](#tackle-cross-imports-between-pages "标题的直接链接") 找到一个页面从另一个页面导入的所有实例,并执行以下两件事之一: 1. 将导入的代码复制粘贴到依赖页面中以移除依赖关系 2. 将代码移动到Shared中的适当段: * 如果它是UI工具包的一部分,将其移动到`📁 shared/ui`; * 如果它是配置常量,将其移动到`📁 shared/config`; * 如果它是后端交互,将其移动到`📁 shared/api`。 备注 **复制粘贴在架构上并不错误**,实际上,有时复制可能比抽象为新的可重用模块更正确。原因是有时页面的共享部分开始分离,在这些情况下你不希望依赖关系阻碍你。 但是,DRY("不要重复自己")原则仍然有意义,所以确保你不是在复制粘贴业务逻辑。否则你需要记住同时在多个地方修复错误。 ## 步骤4. 拆解Shared层[](#unpack-shared-layer "标题的直接链接") 在这一步你可能在Shared层中有很多东西,你通常想要避免这种情况。原因是Shared层可能是代码库中任何其他层的依赖项,因此对该代码进行更改自动更容易产生意外后果。 找到所有只在一个页面上使用的对象,并将其移动到该页面的切片中。是的,*这也适用于actions、reducers和selectors*。将所有actions组合在一起没有好处,但将相关actions放置在接近其使用位置是有好处的。 You should end up with a file structure like this: 📁 src * 📁 app (unchanged) * 📁 pages * 📁 product * 📁 actions * 📁 reducers * 📁 selectors * 📁 ui * 📄 Component.jsx * 📄 Container.jsx * 📄 ProductPage.jsx * 📄 index.js * 📁 catalog * 📁 shared (only objects that are reused) * 📁 actions * 📁 api * 📁 components * 📁 containers * 📁 constants * 📁 i18n * 📁 modules * 📁 helpers * 📁 utils * 📁 reducers * 📁 selectors * 📁 styles ## 步骤5. 按技术目的组织代码[](#organize-by-technical-purpose "标题的直接链接") 在FSD中,按技术目的划分是通过\_段\_来完成的。有几个常见的段: * `ui` — 与UI显示相关的一切:UI组件、日期格式化器、样式等。 * `api` — 后端交互:请求函数、数据类型、映射器等。 * `model` — 数据模型:模式、接口、存储和业务逻辑。 * `lib` — 此切片上其他模块需要的库代码。 * `config` — 配置文件和功能标志。 如果需要,你也可以创建自己的段。确保不要创建按代码是什么分组的段,如`components`、`actions`、`types`、`utils`。相反,按代码的用途分组。 重新组织你的页面以按段分离代码。你应该已经有一个`ui`段,现在是时候创建其他段了,如用于actions、reducers和selectors的`model`,或用于thunks和mutations的`api`。 还要重新组织Shared层以移除这些文件夹: * `📁 components`、`📁 containers` — 其中大部分应该成为`📁 shared/ui`; * `📁 helpers`、`📁 utils` — 如果还有一些重用的helpers,按功能将它们组合在一起,如日期或类型转换,并将这些组移动到`📁 shared/lib`; * `📁 constants` — 再次,按功能分组并移动到`📁 shared/config`。 ## 可选步骤[](#optional-steps "标题的直接链接") ### 步骤6. 从在多个页面使用的Redux切片形成实体/功能[](#form-entities-features-from-redux "标题的直接链接") 通常,这些重用的Redux切片将描述与业务相关的内容,例如产品或用户,因此这些可以移动到Entities层,每个文件夹一个实体。如果Redux切片与用户想要在你的应用中执行的操作相关,如评论,那么你可以将其移动到Features层。 实体和功能意味着彼此独立。如果你的业务域包含实体之间的固有连接,请参考[业务实体指南](/documentation/zh/docs/guides/examples/types.md#business-entities-and-their-cross-references)以获取如何组织这些连接的建议。 与这些切片相关的API函数可以保留在`📁 shared/api`中。 ### 步骤7. 重构你的模块[](#refactor-your-modules "标题的直接链接") `📁 modules`文件夹通常用于业务逻辑,因此它在本质上已经与FSD的Features层非常相似。一些模块也可能描述UI的大块,如应用头部。在这种情况下,你应该将它们迁移到Widgets层。 ### 步骤8. 在`shared/ui`中形成干净的UI基础[](#form-clean-ui-foundation "标题的直接链接") `📁 shared/ui`理想情况下应该包含一组没有编码任何业务逻辑的UI元素。它们也应该是高度可重用的。 重构曾经在`📁 components`和`📁 containers`中的UI组件以分离业务逻辑。将该业务逻辑移动到更高的层级。如果它没有在太多地方使用,你甚至可以考虑复制粘贴。 ## 另请参阅[](#see-also "标题的直接链接") * [(Talk in Russian) Ilya Klimov — Крысиные бега бесконечного рефакторинга: как не дать техническому долгу убить мотивацию и продукт](https://youtu.be/aOiJ3k2UvO4) --- # 从 v1 到 v2 的迁移 ## 为什么是 v2?[](#为什么是-v2 "标题的直接链接") **feature-slices** 的原始概念于 2018 年[被宣布](https://t.me/feature_slices)。 从那时起,该方法论发生了许多变化,但同时\*\*[基本原则得到了保留](https://feature-sliced.github.io/featureslices.dev/v1.0.html)\*\*: * 使用*标准化*的前端项目结构 * 首先按照*业务逻辑*分割应用程序 * 使用*隔离的 features* 来防止隐式副作用和循环依赖 * 使用 *Public API* 并禁止深入模块的"内部" 同时,在方法论的上一个版本中,仍然存在**薄弱环节**: * 有时会导致样板代码 * 有时会导致代码库的过度复杂化和抽象之间不明显的规则 * 有时会导致隐式的架构解决方案,这阻止了项目的提升和新人的入职 方法论的新版本([v2](https://github.com/feature-sliced/documentation))旨在**消除这些缺点,同时保留该方法的现有优势**。 自 2018 年以来,[还开发了](https://github.com/kof/feature-driven-architecture/issues)另一种类似的方法论 - [**feature-driven**](https://github.com/feature-sliced/documentation/tree/rc/feature-driven),最初由 [Oleg Isonen](https://github.com/kof) 宣布。 在合并两种方法后,我们**改进和完善了现有实践** - 朝着更大的灵活性、清晰度和应用效率的方向发展。 > 因此,这甚至影响了方法论的名称 - *"feature-slice**d**"* ## 为什么将项目迁移到v2是有意义的?[](#为什么将项目迁移到v2是有意义的 "标题的直接链接") > `WIP:` 当前版本的方法论正在开发中,一些细节*可能会发生变化* #### 🔍 更透明和简单的架构[](#-更透明和简单的架构 "标题的直接链接") 方法论(v2)提供了**更直观和更常见的抽象以及在开发者之间分离逻辑的方式。** 所有这些对吸引新人、研究项目当前状态以及分配应用程序业务逻辑都有极其积极的影响。 #### 📦 更灵活和诚实的模块化[](#-更灵活和诚实的模块化 "标题的直接链接") 方法论(v2)允许**以更灵活的方式分配逻辑:** * 能够从头开始重构隔离的部分 * 能够依赖相同的抽象,但没有不必要的依赖交织 * 对新模块位置的更简单要求 *(层级 => 切片 => 段)* #### 🚀 更多规范、计划、社区[](#-更多规范计划社区 "标题的直接链接") 目前,`核心团队`正在积极开发方法论的最新(v2)版本 因此对于它: * 将有更多描述的案例/问题 * 将有更多应用指南 * 将有更多真实示例 * 总的来说,将有更多文档用于新人入职和学习方法论概念 * 工具包将在未来开发以符合架构概念和约定 > 当然,第一个版本也会有用户支持 - 但最新版本仍然是我们的优先级 > > 在未来,随着下一次重大更新,你仍然可以访问方法论的当前版本(v2),**对你的团队和项目没有风险** ## Changelog[](#changelog "标题的直接链接") ### `BREAKING` 层级[](#breaking-层级 "标题的直接链接") 现在方法论假设在顶层明确分配层级 * `/app` > `/processes` > **`/pages`** > **`/features`** > `/entities` > `/shared` * *也就是说,现在不是所有东西都被视为功能/页面* * 这种方法允许你[明确设置层级规则](https://t.me/atomicdesign/18708): * 模块所在的**层级越高**,它拥有的**上下文**就越多 *(换句话说 - 层级的每个模块 - 只能导入底层的模块,而不能导入更高层的)* * 模块所在的**层级越低**,对其进行更改的**危险性和责任**就越大 *(因为通常是底层被过度使用)* ### `BREAKING` Shared[](#breaking-shared "标题的直接链接") 基础设施抽象 `/ui`、`/lib`、`/api`,以前位于项目的src根目录中,现在由单独的目录 `/src/shared` 分离 * `shared/ui` - 仍然是应用程序的相同通用UI工具包(可选) * *同时,没有人禁止像以前一样在这里使用`原子设计`* * `shared/lib` - 用于实现逻辑的辅助库集合 * *仍然 - 没有助手的转储* * `shared/api` - 访问API的通用入口点 * *也可以在每个功能/页面中本地注册 - 但不推荐* * 和以前一样 - 在`shared`中不应该有对业务逻辑的显式绑定 * *如有必要,你需要将这种关系提升到`entities`级别或更高* ### `NEW` 实体、流程[](#new-实体流程 "标题的直接链接") 在v2中\*\*,添加了其他新的抽象\*\*来消除逻辑复杂性和高耦合的问题。 * `/entities` - **业务实体**层,包含直接与业务模型相关的切片或仅在前端需要的合成实体 * *示例:`user`、`i18n`、`order`、`blog`* * `/processes` - **业务流程**层,贯穿应用程序 * **该层是可选的**,通常建议在*逻辑增长并开始在多个页面中模糊*时使用 * *示例:`payment`、`auth`、`quick-tour`* ### `BREAKING` 抽象和命名[](#breaking-抽象和命名 "标题的直接链接") 现在定义了具体的抽象和[明确的命名建议](/documentation/zh/docs/about/understanding/naming.md) #### 层级[](#层级 "标题的直接链接") * `/app` — **应用程序初始化层** * *以前的版本:`app`、`core`、`init`、`src/index`(这种情况也会发生)* * `/processes` — [**业务流程层**](https://github.com/feature-sliced/documentation/discussions/20) * *以前的版本:`processes`、`flows`、`workflows`* * `/pages` — **应用程序页面层** * *以前的版本:`pages`、`screens`、`views`、`layouts`、`components`、`containers`* * `/features` — [**功能部分层**](https://github.com/feature-sliced/documentation/discussions/23) * *以前的版本:`features`、`components`、`containers`* * `/entities` — [**业务实体层**](https://github.com/feature-sliced/documentation/discussions/18#discussioncomment-422649) * *以前的版本:`entities`、`models`、`shared`* * `/shared` — [**可重用基础设施代码层**](https://github.com/feature-sliced/documentation/discussions/31#discussioncomment-453020) 🔥 * *以前的版本:`shared`、`common`、`lib`* #### 段[](#段 "标题的直接链接") * `/ui` — [**UI段**](https://github.com/feature-sliced/documentation/discussions/31#discussioncomment-453132) 🔥 * *以前的版本:`ui`、`components`、`view`* * `/model` — [**业务逻辑段**](https://github.com/feature-sliced/documentation/discussions/31#discussioncomment-472645) 🔥 * *以前的版本:`model`、`store`、`state`、`services`、`controller`* * `/lib` — **辅助代码段** * *以前的版本:`lib`、`libs`、`utils`、`helpers`* * `/api` — [**API段**](https://github.com/feature-sliced/documentation/discussions/66) * *以前的版本:`api`、`service`、`requests`、`queries`* * `/config` — **应用程序配置段** * *以前的版本:`config`、`env`、`get-env`* ### `REFINED` 低耦合[](#refined-低耦合 "标题的直接链接") 现在由于新的层级,[遵循模块间低耦合原则](/documentation/zh/docs/reference/slices-segments.md#zero-coupling-high-cohesion)变得更加容易。 *同时,仍然建议尽可能避免极难"解耦"模块的情况* ## See also[](#see-also "标题的直接链接") * [Notes from the report "React SPB Meetup #1"](https://t.me/feature_slices) * [React Berlin Talk - Oleg Isonen "Feature Driven Architecture"](https://www.youtube.com/watch?v=BWAeYuWFHhs) * [Comparison with v1 (community-chat)](https://t.me/feature_sliced/493) * [New ideas v2 with explanations (atomicdesign-chat)](https://t.me/atomicdesign/18708) * [Discussion of abstractions and naming for the new version of the methodology (v2)](https://github.com/feature-sliced/documentation/discussions/31) --- # 从v2.0到v2.1的迁移 v2.1的主要变化是分解界面的新思维模型——页面优先。 在v2.0中,FSD会建议识别界面中的实体和功能,甚至考虑实体表示和交互性的最小部分进行分解。然后你会从实体和功能构建小部件和页面。在这种分解模型中,大部分逻辑都在实体和功能中,页面只是组合层,本身没有太多意义。 在v2.1中,我们建议从页面开始,甚至可能就停在那里。大多数人已经知道如何将应用程序分离为单独的页面,页面也是在代码库中尝试定位组件时的常见起点。在这种新的分解模型中,你将大部分UI和逻辑保留在每个单独的页面中,在Shared中维护可重用的基础。如果需要在多个页面之间重用业务逻辑,你可以将其移动到下面的层级。 Feature-Sliced Design的另一个新增功能是使用`@x`标记法标准化实体之间的交叉导入。 ## 如何迁移[](#how-to-migrate "标题的直接链接") v2.1中没有破坏性更改,这意味着使用FSD v2.0编写的项目在FSD v2.1中也是有效的项目。但是,我们相信新的思维模型对团队更有益,特别是对新开发者的入职,所以我们建议对你的分解进行小的调整。 ### 合并切片[](#合并切片 "标题的直接链接") 一个简单的开始方式是在项目上运行我们的linter,[Steiger](https://github.com/feature-sliced/steiger)。Steiger是基于新的思维模型构建的,最有用的规则将是: * [`insignificant-slice`](https://github.com/feature-sliced/steiger/tree/master/packages/steiger-plugin-fsd/src/insignificant-slice) — 如果一个实体或功能只在一个页面中使用,此规则将建议将该实体或功能完全合并到页面中。 * [`excessive-slicing`](https://github.com/feature-sliced/steiger/tree/master/packages/steiger-plugin-fsd/src/excessive-slicing) — 如果一个层级有太多切片,这通常是分解过于细粒度的标志。此规则将建议合并或分组一些切片以帮助项目导航。 ``` npx steiger src ``` 这将帮助你识别哪些切片只使用一次,以便你可以重新考虑它们是否真的必要。在这种考虑中,请记住层级为其内部的所有切片形成某种全局命名空间。就像你不会用只使用一次的变量污染全局命名空间一样,你应该将层级命名空间中的位置视为有价值的,要谨慎使用。 ### 标准化交叉导入[](#标准化交叉导入 "标题的直接链接") 如果你的项目之前有交叉导入(我们不评判!),你现在可以利用Feature-Sliced Design中交叉导入的新标记法——`@x`标记法。它看起来像这样: entities/B/some/file.ts ``` import type { EntityA } from "entities/A/@x/B"; ``` 更多详情,请查看参考中的[交叉导入的公共API](/documentation/zh/docs/reference/public-api.md#public-api-for-cross-imports)部分。 --- # 与 Electron 一起使用 Electron 应用程序具有特殊的架构,由具有不同职责的多个进程组成。在这种情况下应用 FSD 需要将结构适应 Electron 的特性。 ``` └── src ├── app # Common app layer │ ├── main # Main process │ │ └── index.ts # Main process entry point │ ├── preload # Preload script and Context Bridge │ │ └── index.ts # Preload entry point │ └── renderer # Renderer process │ └── index.html # Renderer process entry point ├── main │ ├── features │ │ └── user │ │ └── ipc │ │ ├── get-user.ts │ │ └── send-user.ts │ ├── entities │ └── shared ├── renderer │ ├── pages │ │ ├── settings │ │ │ ├── ipc │ │ │ │ ├── get-user.ts │ │ │ │ └── save-user.ts │ │ │ ├── ui │ │ │ │ └── user.tsx │ │ │ └── index.ts │ │ └── home │ │ ├── ui │ │ │ └── home.tsx │ │ └── index.ts │ ├── widgets │ ├── features │ ├── entities │ └── shared └── shared # Common code between main and renderer └── ipc # IPC description (event names, contracts) ``` ## 公共 API 规则[](#公共-api-规则 "标题的直接链接") 每个进程必须有自己的公共 API。例如,您不能将模块从 `main` 导入到 `renderer`。 只有 `src/shared` 文件夹对两个进程都是公共的。 描述进程交互的契约也是必要的。 ## 额外更改标准结构[](#额外更改标准结构 "标题的直接链接") 建议使用新的 `ipc` 段,其中进程之间的交互发生。 `pages` 和 `widgets` 层,基于其名称,不应出现在 `src/main` 中。您可以使用 `features`、`entities` 和 `shared`。 `src/app` 层中的 `app` 层包含 `main` 和 `renderer` 的入口点,以及 IPC。 不希望 `app` 层中的段有交集 ## 交互示例[](#交互示例 "标题的直接链接") src/shared/ipc/channels.ts ``` export const CHANNELS = { GET_USER_DATA: 'GET_USER_DATA', SAVE_USER: 'SAVE_USER', } as const; export type TChannelKeys = keyof typeof CHANNELS; ``` src/shared/ipc/events.ts ``` import { CHANNELS } from './channels'; export interface IEvents { [CHANNELS.GET_USER_DATA]: { args: void, response?: { name: string; email: string; }; }; [CHANNELS.SAVE_USER]: { args: { name: string; }; response: void; }; } ``` src/shared/ipc/preload.ts ``` import { CHANNELS } from './channels'; import type { IEvents } from './events'; type TOptionalArgs
My Custom App component
Loading...
;
}
if (isError || !post) {
return <>{error?.message};
}
return (
Post id: {post.id}
{post.title}
{post.body}
Owner: {post.userId}
Components on this layer should not contain business logic, but it's okay for them to be business-themed. For example, you can put the company logo and page layout here. Components with UI logic are also allowed (for example, autocomplete or a search bar). * `📁 lib` — a collection of internal libraries.
This folder should not be treated as helpers or utilities ([read here why these folders often turn into a dump](https://dev.to/sergeysova/why-utils-helpers-is-a-dump-45fo)). Instead, every library in this folder should have one area of focus, for example, dates, colors, text manipulation, etc. That area of focus should be documented in a README file. The developers in your team should know what can and cannot be added to these libraries. * `📁 config` — environment variables, global feature flags and other global configuration for your app. * `📁 routes` — route constants or patterns for matching routes. * `📁 i18n` — setup code for translations, global translation strings. 你可以自由添加更多段,但要确保这些段的名称描述内容的目的,而不是其本质。例如,`components`、`hooks`和`types`是不好的段名称,因为它们在你寻找代码时没有太大帮助。 ### Entities[](#entities "标题的直接链接") 这一层的切片代表项目正在处理的现实世界概念。通常,它们是业务用来描述产品的术语。例如,社交网络可能会处理用户(User)、帖子(Post)和群组(Group)等业务实体。 实体切片可能包含数据存储(`📁 model`)、数据验证模式(`📁 model`)、与实体相关的API请求函数(`📁 api`),以及该实体在界面中的视觉表示(`📁 ui`)。视觉表示不必产生完整的UI块 — 它主要是为了在应用程序的多个页面中重用相同的外观,不同的业务逻辑可以通过props或slots附加到它上面。 #### 实体关系[](#实体关系 "标题的直接链接") FSD中的实体是切片,默认情况下,切片不能相互了解。然而,在现实生活中,实体经常相互交互,有时一个实体拥有或包含其他实体。因此,这些交互的业务逻辑最好保存在更高的层级中,如功能(Features)或页面(Pages)。 当一个实体的数据对象包含其他数据对象时,通常最好明确实体之间的连接,并通过使用`@x`标记法创建交叉引用API来绕过切片隔离。原因是连接的实体需要一起重构,所以最好让连接不可能被忽略。 For example: entities/artist/model/artist.ts ``` import type { Song } from "entities/song/@x/artist"; export interface Artist { name: string; songs: Array
例如,如果您有一个用于 feature “comments” 的 index,`📄 features/comments/index.js`,则没有理由为该 feature 的 `ui` segment 有另一个 index,`📄 features/comments/ui/index.js`。 3. 如果您有一个非常大的项目,很可能您的应用程序可以分割成几个大块。
例如,Google Docs 在文档编辑器和文件浏览器方面有非常不同的责任。您可以创建一个 monorepo 设置,其中每个包都是一个单独的 FSD 根,具有自己的 layers 集。某些包可能只有 Shared 和 Entities layers,其他包可能只有 Pages 和 App,还有一些包可能包含它们自己的小 Shared,但仍然使用另一个包中的大 Shared。 --- # Slices 和 segments ## Slices[](#slices "标题的直接链接") Slices 是 Feature-Sliced Design 组织层次结构中的第二级。它们的主要目的是按其对产品、业务或应用程序的意义对代码进行分组。 Slices 的名称没有标准化,因为它们直接由您应用程序的业务领域决定。例如,照片库可能有 slices `photo`、`effects`、`gallery-page`。社交网络将需要不同的 slices,例如 `post`、`comments`、`news-feed`。 Layers Shared 和 App 不包含 slices。这是因为 Shared 应该不包含任何业务逻辑,因此对产品没有意义,而 App 应该只包含涉及整个应用程序的代码,所以不需要分割。 ### 零耦合和高聚合[](#zero-coupling-high-cohesion "标题的直接链接") Slices 旨在成为独立且高度聚合的代码文件组。下面的图形可能有助于可视化\_聚合性\_和\_耦合性\_这些复杂的概念:  Image inspired by